What is the Blue Hour?
The blue hour is the time between sunset and the darkness of night. During this time, the sky takes on a special colour. As it progresses from a lighter to a very dark blue, almost black. Especially in photography this time is very popular. Because you can take really beautiful and colourful pictures here.
It is not yet pitch dark and the subjects are still recognisable. Shadows are only created by artificial light, which, depending on the colour temperature, produces a beautiful colour contrast to the dark blue of the sky. Buildings that are illuminated from the inside and thus have light coming out of the windows are particularly impressive.
What do I need to take photos.
You can take a lot of photos with your smartphone these days. But when it gets dark, the little things quickly reach their limits. Because then even the digital helpers are at the end of their possibilities. The exposure time for pictures taken during the blue hour is much longer than 1/30s and therefore cannot be taken manually without blurring. So you should definitely have a tripod with you to give the camera a firm footing. In addition, a remote release, whether wireless or wired, is very useful. Because with long exposures, even releasing the shutter is a blur.
In order to proceed perfectly, provided your camera offers this feature, you should activate the mirror lock-up. This also eliminates the slight vibration when the mirror of a reflex camera is raised. This is then released when the shutter button is pressed for the first time and the actual exposure begins when the shutter is released for the second time.
It is also very important to take photos in manual mode because this is the only way you can adjust the settings for exposure time and aperture yourself. Otherwise the camera will always try to make the picture as bright as possible by using a high ISO or an extremely long exposure. I always choose an ISO of 100 to avoid unattractive noise from the outset, which can quickly occur with high ISO values. My Canon EOS 5D Mark IV is very good in this respect but many cameras, especially cheaper ones, thank me for high ISO values with strong noise.
As a lens, I would always advise a wide angle. Depending on how far away you are from your subject, the wide-angle lens offers you a wide field of view and the possibility to combine a lot of the subject and the sky. You can always crop it later on your PC.
Now look for a nice motif, preferably with a good view of the sky and hope for few clouds. Because with a cloudless sky, the pictures in the blue hour look even more impressive. Few to no people are also an advantage, because remember that they are usually moving and if we expose for 20 seconds we will no longer recognise people, but streaks (ghost images) which would only disturb our motif. These can be easily removed today (e.g. with Photoshop) but with many people this is rather difficult.
Now you have to try, try, try. Whereby…. You don’t have to experiment so much with the aperture. In most cases you need a large depth of field. This means that as much as possible from foreground to horizon is in focus. I usually use aperture 11-13 for this.
So if you have the ISO at 100, the aperture at 11 or 13, you only need to test with the shutter speed (exposure time) which gives the best result. Since the blue hour in our latitudes does not last forever (usually about 30-60 minutes) and during this time the brightness and thus the colour of the sky continues to change, you must permanently adjust the shutter speed for further exposures.
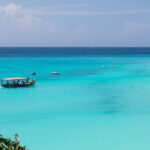
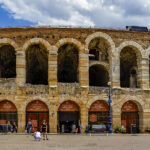
A couple of examples from me: